Advanced topics
This section covers some advanced topics, which may be only relevant for a smaller group of people. Functionality may be extended but also removed in future
Camera following objects and interacting with model view
For some models, it may be advantageous to track the translation and/or rotation of certain bodies, e.g., for cars, (wheeled) robots or bicycles. Since Exudyn 1.4.18 you can attach view to a marker, using the visualization setting
SC.visualizationSettings.interactive.trackMarker = nMarker
in which nMarker represents the desired marker number to follow.
See also related options in SC.visualizationSettings.interactive in Section VSettingsInteractive.
The following paragraph represents a slower, slightly outdated approach, which may be interesting for advanced usage of object tracking.
To do so, the current render state (SC.renderer.GetState(), SC.renderer.SetState(...)) can be obtained and modified, in order to always follow a certain position.
As this needs to be done during redraw of every frame, it is conveniently done in a graphicsUserFunction, e.g., within the ground body. This is shown in the following example, in which mbs.variables['nTrackNode'] is a node number to be tracked:
#mbs.variables['nTrackNode'] contains node number
def UFgraphics(mbs, objectNum):
    n = mbs.variables['nTrackNode']
    p = mbs.GetNodeOutput(n,exu.OutputVariableType.Position,
                          configuration=exu.ConfigurationType.Visualization)
    rs=SC.renderer.GetState() #get current render state
    A = np.array(rs['modelRotation'])
    p = A.T @ p #transform point into model view coordinates
    rs['centerPoint']=[p[0],p[1],p[2]]
    SC.renderer.SetState(rs)  #modify render state
    return []

#add object with graphics user function
oGround2 = mbs.AddObject(ObjectGround(visualization=
               VObjectGround(graphicsDataUserFunction=UFgraphics)))
#.... further code for simulation here
NOTE that this approach is slower and it may lead to a (usually silient) crash after closing the renderer, as the renderer thread is somehow coupled to Python which is prohibited from Python side.
Contact problems
Since Q4 2021 a contact module is available in Exudyn.
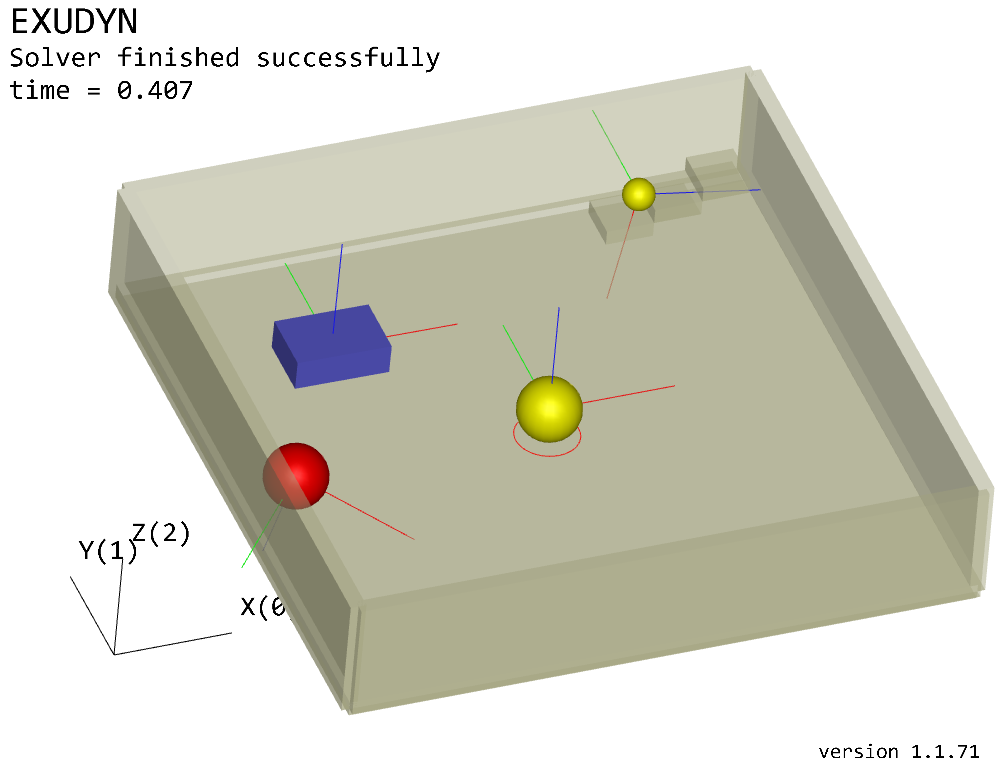
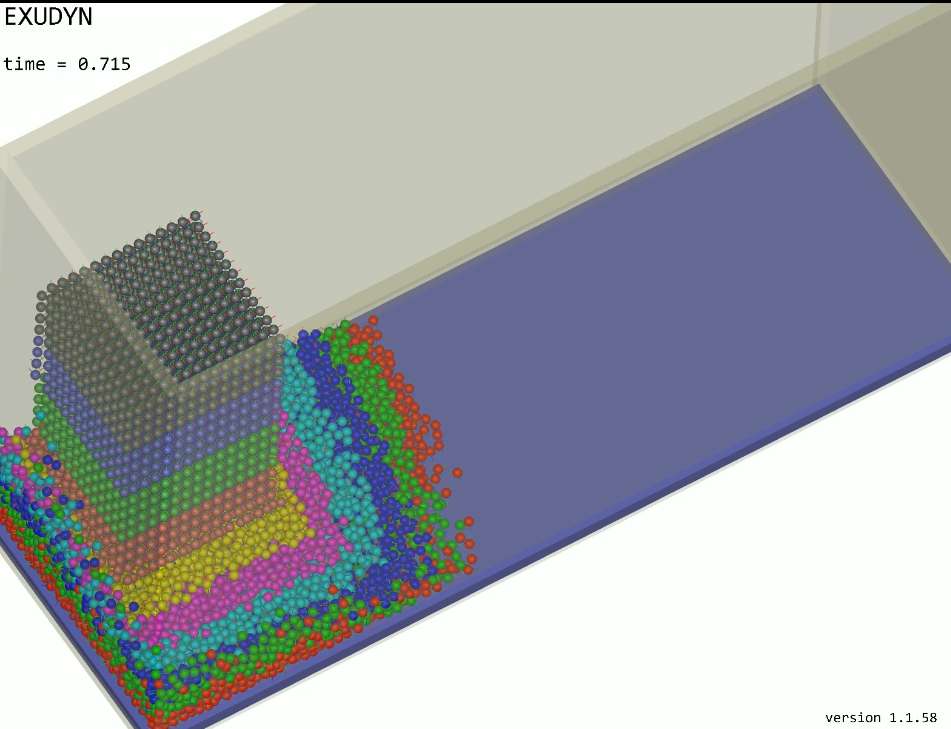
This separate module GeneralContact [still under development, consider with care!] is highly optimized and implemented with parallelization (multi-threaded) for certain types of contact elements.


Fig. 8 Some tests and examples using GeneralContact
Note:
GeneralContactis (in most cases) restricted to dynamic simulation (explicit or implicit [still under development, consider with care!] ) if friction is used; without friction, it also works in the static casein addition to
GeneralContactthere are special objects, in particular for rolling and simple 1D contacts, that are available as single objects, cf.ObjectConnectorRollingDiscPenaltyGeneralContactis recommended to be used for large numbers of contacts, while the single objects are integrated more directly into mbs.
Currently, GeneralContact includes:
Sphere-Sphere contact (attached to any marker); may represent circle-circle contact in 2D
Triangles mounted on rigid bodies, in contact with Spheres [only explicit]
ANCFCable2D contacting with spheres (which then represent circles in 2D) [partially implicit, needs revision]
For details on the contact formulations, see Section Theory: Contact.
OpenVR
The general open source libraries from Valve, see
have been linked to Exudyn. In order to get OpenVR fully integrated, you need to run setup.py Exudyn with the --openvr flag. For general installation instructions, see Section Installation instructions.
Running OpenVR either requires an according head mounted display (HMD) or a virtualization using, e.g., Riftcat 2 to use a mobile phone with an according adapter. Visualization settings are available in interactive.openVR, but need to be considered with care.
An example is provided in openVRengine.py, showing some optimal flags like locking the model rotation, zoom or translation.
Everything is experimental, but contributions are welcome!
Interaction with Julia
The scientific community gets increasingly interested into the language Julia. There is a very simple interoperability with julia – at least from julia to Python – which has been tests. The other way – calling Python from julia – is also possible, but it is left to the reader.
After installing julia (tested on Windows 10 with julia 1.6.7), you need to add Python accessibility via PyCallin julia:
using Pkg
Pkg.add("PyCall")
Ideally, you have a certain Python installation where Exudyn is already installed (and for the following examples, you also need matplotlib). Find the according Python path in any Python console:
import sys
print(sys.executable)
Use this path and adapt the following julia script (‘raw’ allows to use single backslash) in julia:
ENV["PYTHON"]=raw"C:\Users\xyz\.condavs\venvP38\python.exe"
Pkg.build("PyCall")
Now we can interact with Python, using Python objects in julia almost natively, try:
py"""
import exudyn
from exudyn.demos import *

Demo1()
"""
This will run the very simple Exudyn Demo1.
As exudyn is now imported into this Python session, you can access it, e.g., py"exudyn".Help()will write the help message.
To show the interoperability with julia, test the following example (similar to Demo1) in julia:
py"""
import exudyn as exu               #EXUDYN package including C++ core part
import exudyn.itemInterface as eii #conversion of data to exudyn dictionaries

SC = exu.SystemContainer()         #container of systems
mbs = SC.AddSystem()               #add a new system to work with

nMP = mbs.AddNode(eii.NodePoint2D(referenceCoordinates=[0,0]))
mbs.AddObject(eii.ObjectMassPoint2D(physicsMass=10, nodeNumber=nMP ))
mMP = mbs.AddMarker(eii.MarkerNodePosition(nodeNumber = nMP))
mbs.AddLoad(eii.Force(markerNumber = mMP, loadVector=[0.001,0,0]))

#add a sensor:
s = mbs.AddSensor(eii.SensorNode(nodeNumber=nMP,
                  outputVariableType=exu.OutputVariableType.Position,
                  storeInternal=True))

mbs.Assemble()                     #assemble system and solve
simulationSettings = exu.SimulationSettings()
simulationSettings.timeIntegration.verboseMode=1 #provide some output
simulationSettings.solutionSettings.coordinatesSolutionFileName = 'solution/demo1.txt'

exu.SolveDynamic(mbs, simulationSettings)
print('results can be found in local directory: solution/demo1.txt')
"""
We can access Python variables from julia via py"..." to read out, e.g., mbs:
py"mbs".systemData.Info()
We can use variables (or objects) directly in julia, e.g.,
mbs=py"mbs"
print(mbs)
Finally, we can also plot values via PlotSensor (matplotlib in the background):
eplt=pyimport("exudyn.plot")
eplt.PlotSensor(py"mbs", py"s")
We could also access the stored sensor data in julia, using
x = py"mbs".GetSensorStoredData(py"s")
and we could just print (or use) the first 10 rows of this data generated on the Python side, using it in julia:
x[1:10,:]
NOTE the 1-based indexing in julia, which highlights the limitations of this approach.
To finally check if the GLFW renderer also runs via julia, just use:
py"""
from exudyn.demos import *
Demo2()
"""
For the full range of possibilities, see github.com/JuliaPy/PyCall.jl.
Interaction with other codes
Interaction with other codes and computers (E.g., MATLAB or other C++ codes, or other Python versions)
is possible.
To connect to any other code, it is convenient to use a TCP/IP connection. This is enabled via
the exudyn.utilities functions
CreateTCPIPconnectionTCPIPsendReceiveCloseTCPIPconnection
- Basically, data can be transmitted in both directions, e.g., within a preStepUserFunction. In Examples, you can find
TCPIPexudynMatlab.py which shows a basic example for such a connectivity.
ROS
Basic interaction with ROS has been tested. However, make sure to use Python 3, as there is no (and will never be any) Python 2 support for Exudyn.